
Delete Face and Patch – quickly eliminate fragments
- MadCadSkills
- Jul 16, 2019
- 2 min read
Sometimes during modeling you get some strange results. Theses could be corners sticking through. Excess that needs to be trimmed off. Or an instance that you cannot skip. To get rid of it using conventional means would take some time to make sure it retains the original look can be stressful to get it right.

Like the in the figure. You did too much but you want to just get rid of one of the red corners. Almost impossible without hitting the other ones.
Best solution is to use delete face. This can be found under the direct editing tab.
DO not see the Direct Editing Tab
If you do not see the direct editing tab. You would need to right click the tabs and activate it from the drop menu.


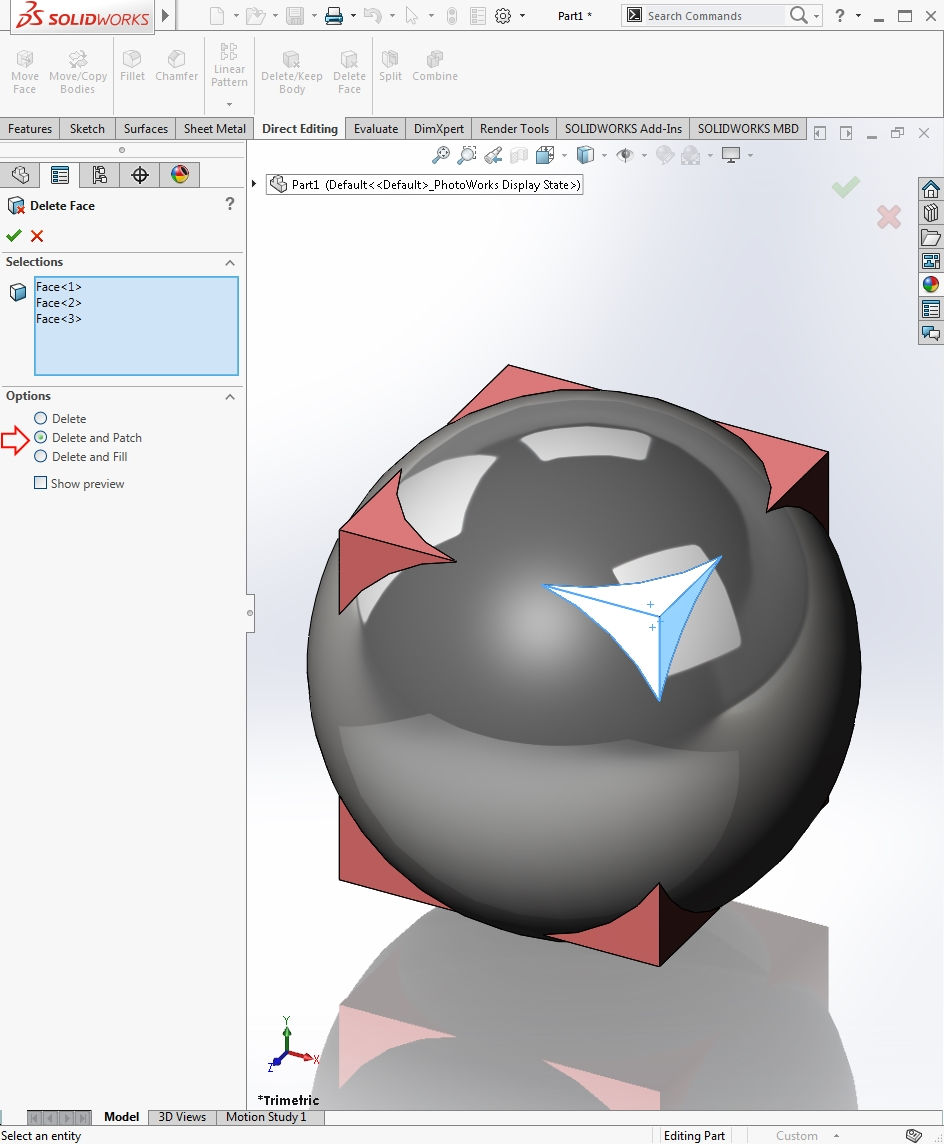
Select the surfaces you want to get rid of (Figure 1). You would want to make sure that every area is selected. Missing one face will prevent it from completing. Set the tab to delete and patch.
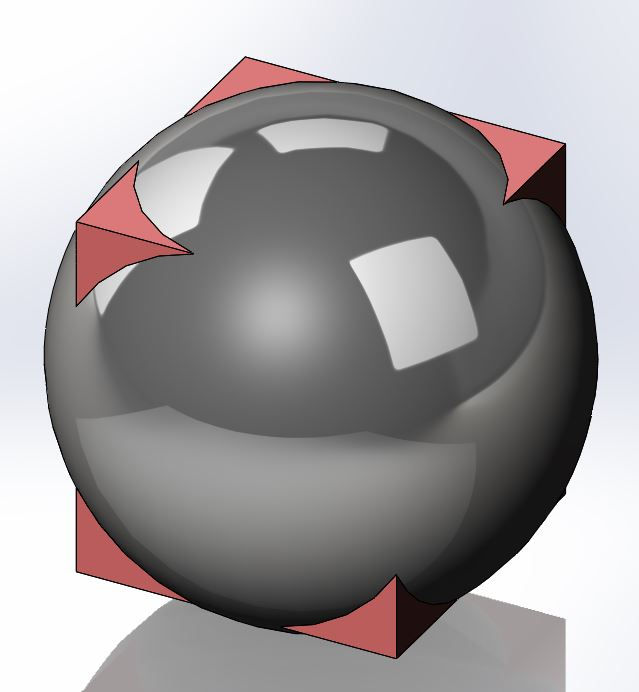
The end result. you will get it with the original sphere shape (Figure 2).
By far one the most powerful features in SolidWorks. One that few designers are aware of. I have used this with almost every model I have made. But this example is too simple so let’s make it more complicated.

What about something like this example. You want to get rid of that bottom fillet. Just select that single edge and delete face and select delete and patch.
The program will fill in the area with what is existing. forming a smooth edge.


This example show a nic on the model. Perhaps something left behind from a extrude. Using delete face can get rid of that and save a lot of time. This happens a lot and being able to erase errors like this can speed up modeling by a lot.


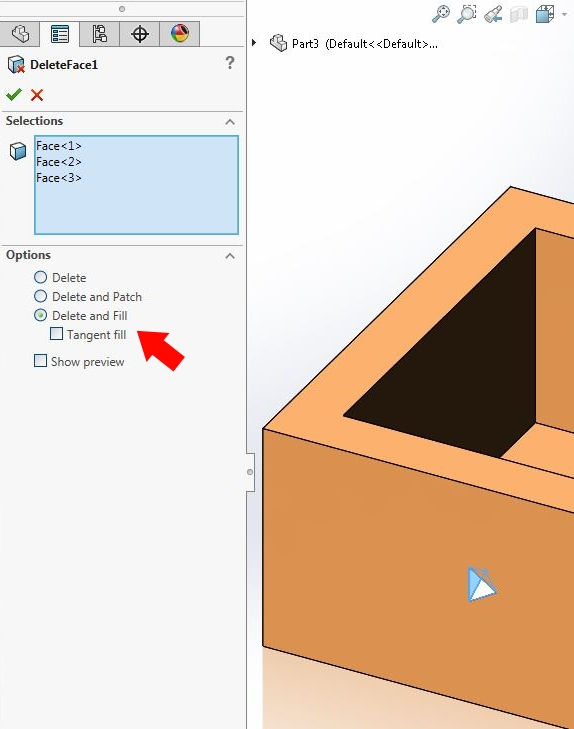
What about the other option delete and fill. This does something that can be useful in special cases but is limited.
What this does it keeps the outline of the fill in area as lines. These lines are similar to what scribe or split line would do.
When we do a cut away there is nothing wrong either on the inside. Just your ordinary solid object.


Comments